Gardening Theme Front Door Wreath Tutorial Using Dollar Store Supplies
Step by step directions for making a gardening theme front door wreath using supplies from the dollar store.
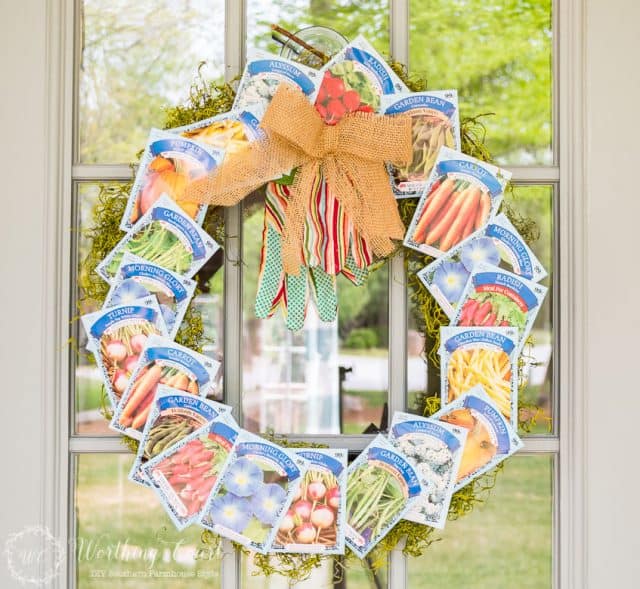
I get tired of using the same front door wreath season after season and love to come up with something different. I rarely purchase a ready made wreath, but much prefer to create something on my own. What could be more perfect for spring and summer than a gardening themed wreath?
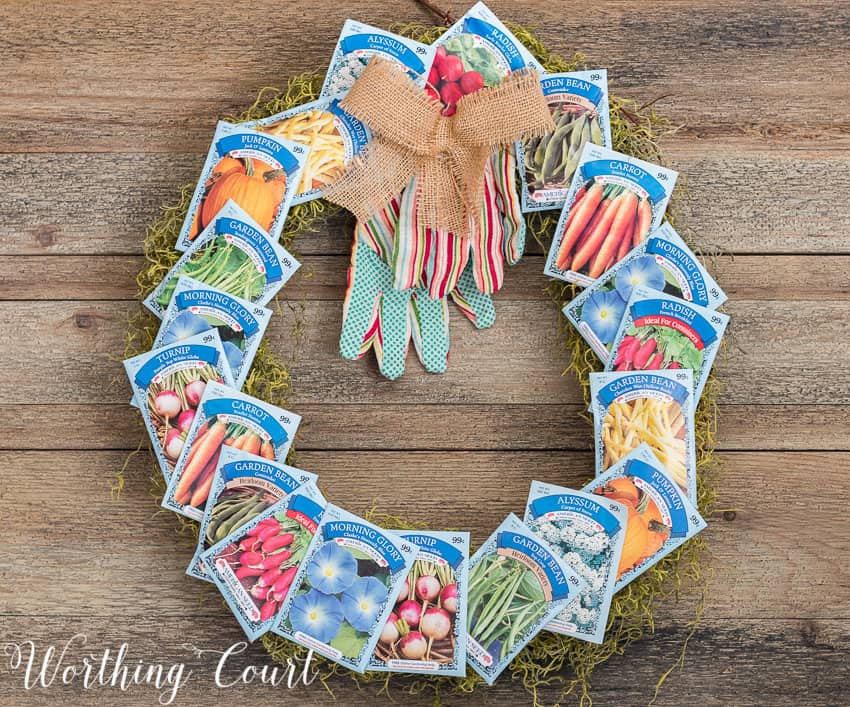
Since this is the time of year when many of us are getting our flowers started and vegetable seeds planted, a seed packet wreath seemed like a natural fit. We’ll be enjoying all that fresh produce straight out of our gardens in no time at all. My mouth waters just thinking of ripe, juicy tomatoes and watermelons!
Even though I prefer to make my own front door wreath, as opposed to buying a new one, I still want it to be a quick, easy and inexpensive process. This entire wreath took me about fifteen minutes to create. I’m totally smitten with how it looks on my door!
It would be a great gift too for birthdays, Mother’s Day, house warming or just because. Let me show you how easy it is to make.

(Affiliate links have been used in this post. See my full disclosure HERE.)
SUPPLIES:
20 Flower and/or Vegetable Seed Packets – mine came from the dollar store for only 50¢ each
1 Pair Gardening Gloves – mine came from the dollar store
Burlap Fabric cut into 1″ wide strips or 1″ wide Burlap Ribbon
STEP 1:
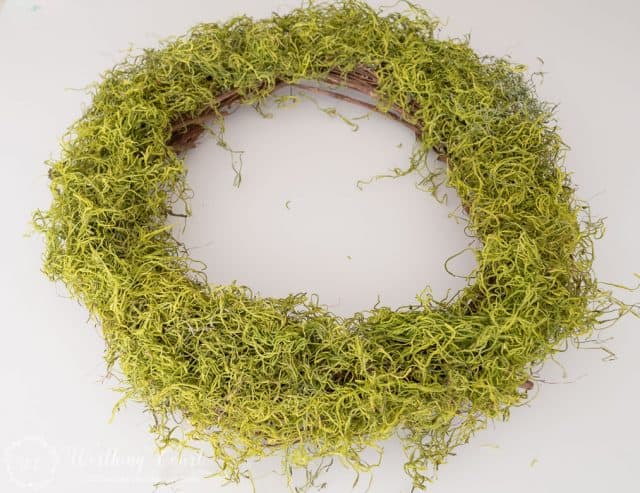
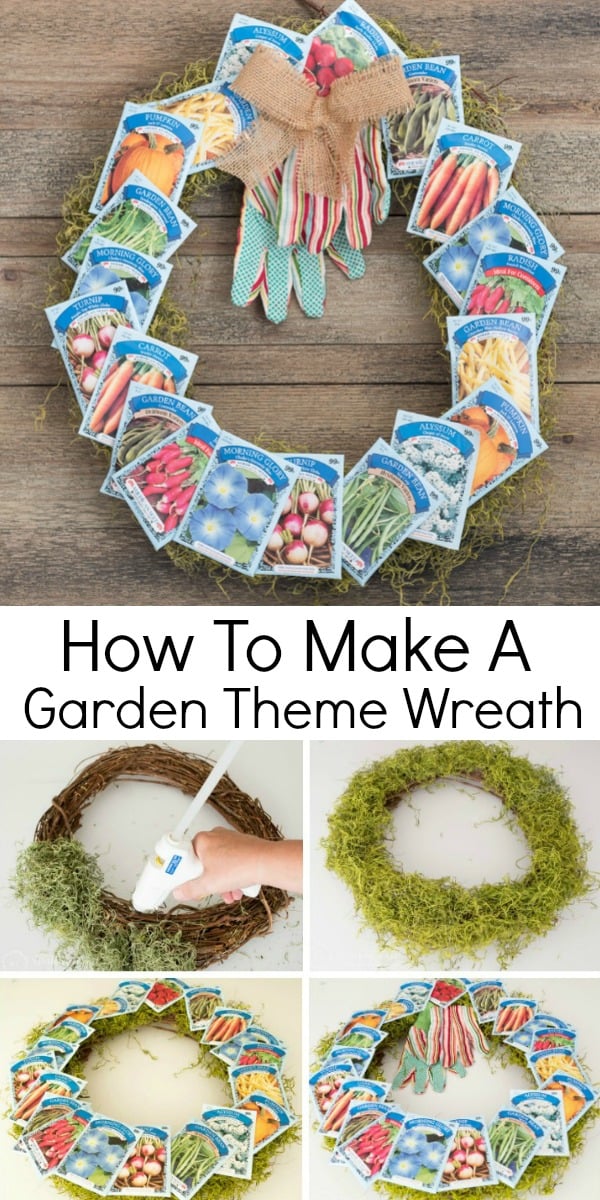
Attach the Spanish moss to the wreath with hot glue, by randomly placing gobs of glue on the wreath and pressing the moss into it. Be careful not to press your fingers into the hot glue!

This is what the wreath should look like once all of the moss has been attached. You may have little bits fall off, but that’s okay.
STEP 2:
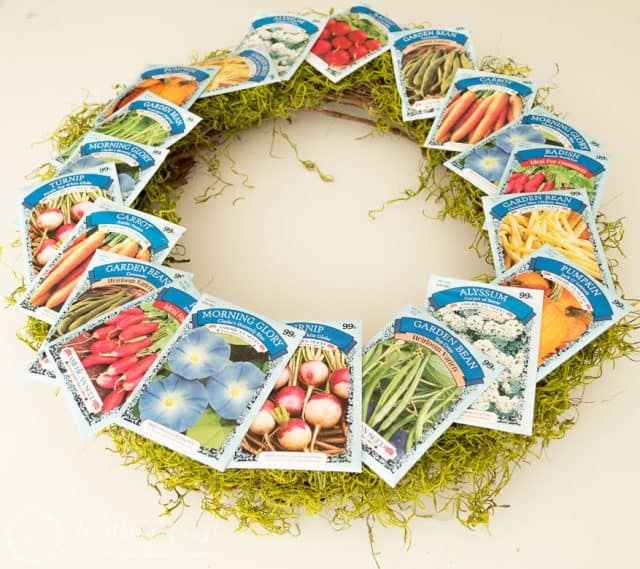
Hot glue the individual seed packets to the top of the moss. Press into place. Arrange the seed packets at different angles for interest. If you have duplicates, be sure to spread them out.
STEP 3:
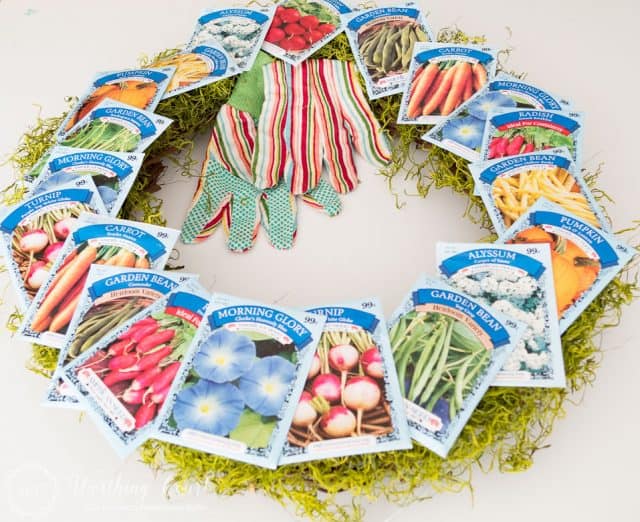
Attach the gloves to the wreath using hot glue. I folded one glove in half and turned the other glove around so that you could see the palm side of it. Before attaching the gloves to the wreath, I attached them to each other with a blob of hot glue. I attached the seed packets before the gloves so that I could get a better visual idea of where the gloves would look the best.
STEP 4:
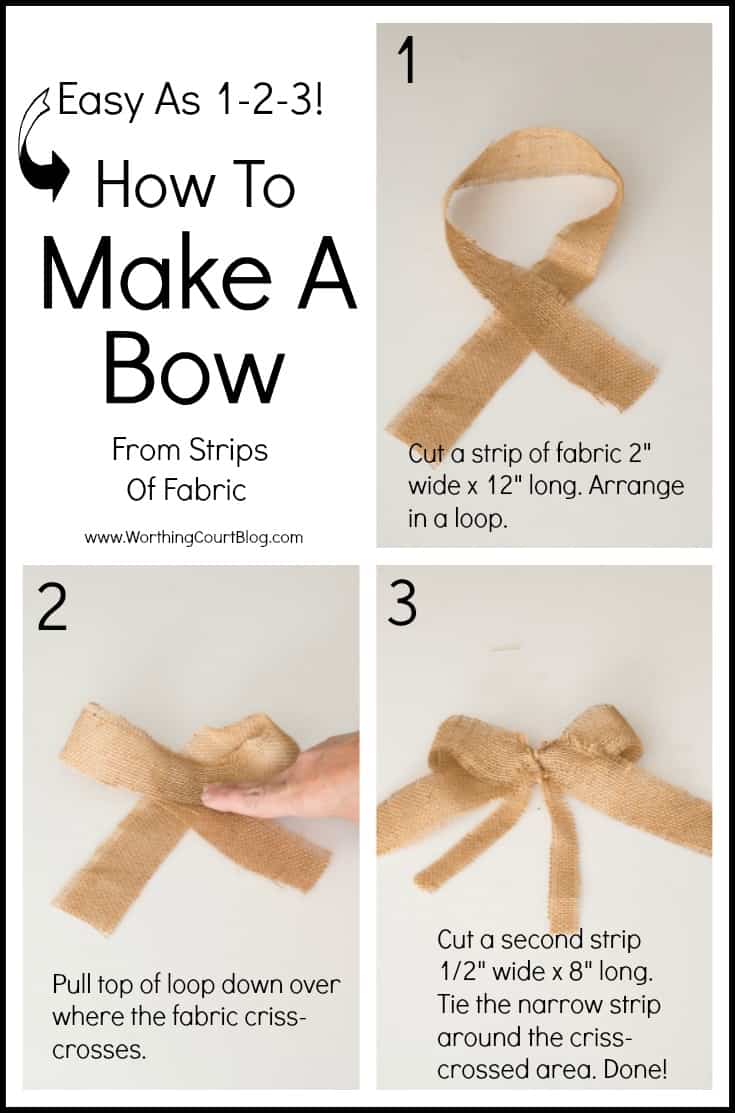
Make a burlap bow using strips of fabric or burlap ribbon. Hot glue the ribbon toward the top of where the gloves are attached. Directions for making an easy bow are below.
Here’s an easy, easy method for making your own bows.
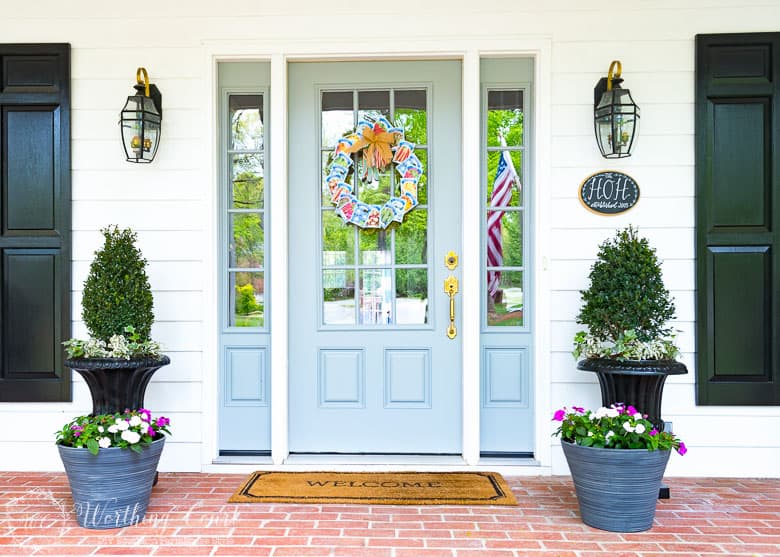
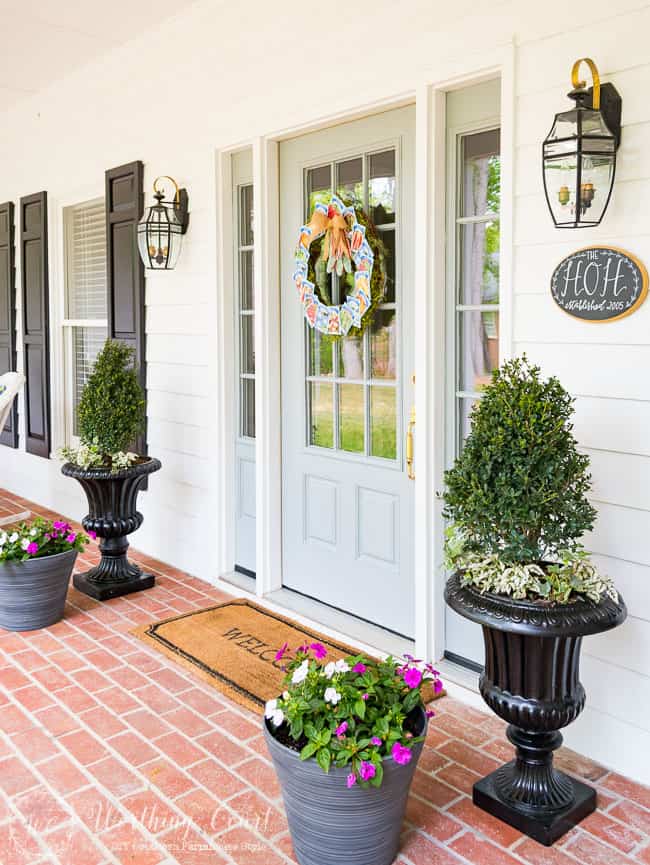
Hang your front door wreath and enjoy! Think I’ll fool my guests into believing that I’m a master gardener with a green thumb? I sort of doubt it.

It is just adorable and so fresh looking. The gloves top it off 🙂
Thank you, Dawn! I thought the gloves were pretty cute too.
Love this Suzy…you always have such cute ideas that are fun to make?☺
Thank you, Gloria! I was pretty tickled with how it turned out.
So cute! I love it!
Thank you, Lynda!
Your wreath is really cute! I love to buy seed packets at Dollar Tree and use them for many different things.
Pinning this pretty little wreath. 🙂
Thank you so much, Stacey!
I love this wreath. What a unique idea. Thanks for sharing it.
I love this cute little wreath. I’m going to make one for my vegetable garden. I’m going to use all the vegetable seed packets I’m growing this year. I have a metal garden stake I can hang it from. Thanks for such a clever DIY, Suzy!
What a cute idea with the wreath! thanks for sharing your friends outdoor space lovely
Thanks for the tip on making a bow. My bows always look like they were made by my dog!
What a clever idea. Just love it and the garden gloves are the real WOW factor. I’ll be off to the store, once they open, for everything I will need! Thanks for a great idea, keep them coming!?
What a fresh and fun wreath! Love your tutorial, too. It’s really is easy to make. I look forward to enjoying one on my sunroom door. XOXO Susie from The Chelsea Project
A Great and creative idea Suzy…it is adorable!
Thanks for sharing! I like the wreath without the seed packets…so much potential!
That wreath is just adorable. It would also look great in a area on a garden shed door or in a potting area.
I love it, it’s perfect for spring!
If you have time, I would love for you to come and share this post over at the Really Crafty link party that is live right now! (http://keepingitrreal.blogspot.com.es/2016/05/welcome-to-the-18th-edition-of-the-really-crafty-link-party.html).
This is such a great idea, Suzy! What a creative way to usher in the spring and have a bit of curb appeal as well. Thanks so much for sharing this with us on #shinebloghop
My daughters are a little obsessed with vegetable seeds (I don’t know why but they always want me to buy them when we go to Home Depot) and they would absolutely love this! Thanks so much for sharing with us at Share The Wealth Sunday! xoxo
What a cute wreath! It has a bit of a retro look to it. Thanks for linking up with us at Throwback Thursday!
Mollie
Such an unique idea!! Pinning it!!Thank you for linking up with us at #HomeMattersParty. We would love to have you again next week.
This is so stinkin’ cute!!!
You are so kind to offer this gift card opportunity. Thanks for all you share.
Greetings Suzy, I appreciate your blog and all you do to help me stay inspired for my home. I am recently retired and looking forward to painting some rooms. Therefore, I would would use the gift card for paint. Not very exciting but necessary. Can you recommend some neutral, French Country, colors for a master bedroom?
Congrats on your retirement! If you are wanting a neutral color in your room, I highly recommend Sherwin Williams Accessible Beige. We painted our entire house with it. It adds just enough warmth to keep my rooms from feeling stark and goes with any color that I use in the room. Have fun painting!