Transform Your Space: Easy Ways to Get Out of a Decorating Rut
Are you stuck in a decorating rut? Here’s how to get back on track and love your home again.
We’ve all been there—staring at our space, feeling uninspired and unsure of how to breathe new life into it. If you’re stuck in a decorating rut, you’re not alone!
Whether you’re tired of your current decor, stuck in a cycle of making the same old choices, afraid of making mistakes, or overwhelmed by endless options, it’s easy to feel paralyzed.
Even though I consider myself a capable decorator, I’ve found myself stuck more times than I care to admit. It’s frustrating when you know you want to refresh your space, but you just don’t know where or how to begin.
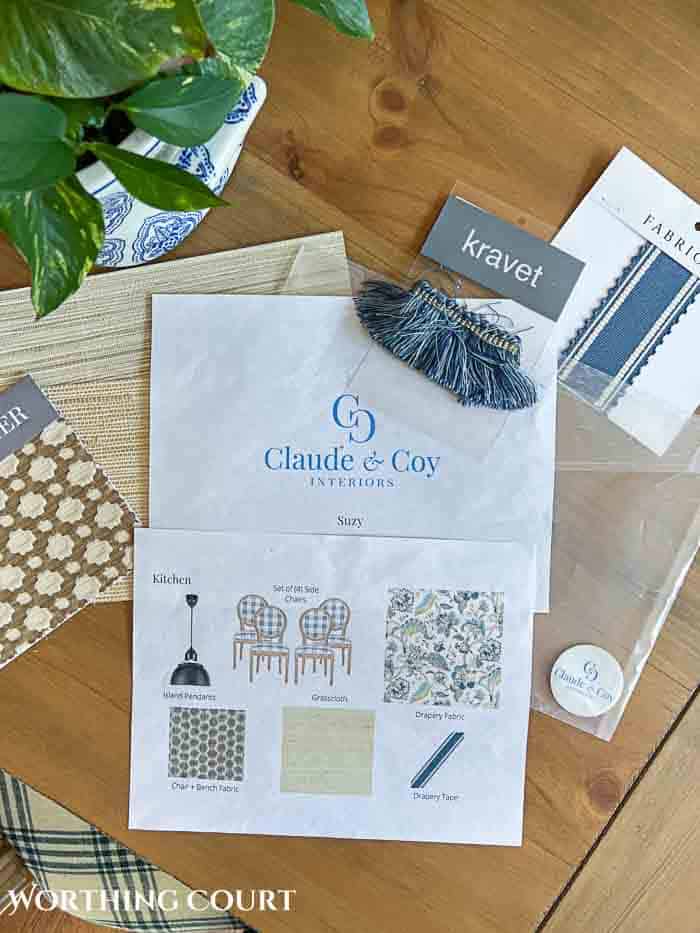
And here’s a little secret: even professional interior designers hit design ruts! Yup, it happens to all of us. In fact, I found myself in such a deep decorating slump while trying to revamp my breakfast room that I had to hire an interior designer for a fresh perspective.
But don’t worry, I’ve got your back! In this post, I’ll share some practical, actionable steps to help you get out of that rut and fall in love with your home again.
How do you get out of a decorating rut?
It might feel like you’re trapped in a never-ending cycle of indecision, but trust me, getting out of a decorating rut is entirely possible! The good news is that there are practical steps you can take to reignite your creativity and get back on track.
- Reflect on What’s Not Working– Take a step back and really look at your space. Grab a notebook or open a notes app and make a list of what’s not feeling right. Is the color scheme too dull? The furniture layout not functional anymore? Or maybe everything just feels outdated? By pinpointing what’s bugging you, you’ll have a clearer direction on where to start.
- Look for Fresh Inspiration– Sometimes all it takes is a little inspiration to get the ball rolling. Spend some time on Pinterest, Instagram, or even flip through home decor magazines. Save the images and ideas that make your heart skip a beat—even if they push you outside your usual comfort zone. You might discover a new direction or color palette you hadn’t considered before.
- Create a Mood Board– This is one of my favorite tricks! Whether digital or physical, mood boards are a fantastic way to visualize your ideas in one place. Collect your favorite images, patterns, and colors and see how they come together. It’ll help you get a sense of the overall vibe you want to achieve, and it might spark ideas you hadn’t thought of yet.
- Break It Down into Manageable Goals– Feeling overwhelmed is common when it comes to redesigning a space. So, let’s make it easier by breaking the process into smaller tasks. Start with something simple, like redecorating your coffee table or refreshing one corner of a room. When you accomplish even small goals, it’ll give you the momentum to tackle bigger projects.
- Experiment with Small Changes– You don’t need to completely overhaul your space to make a difference. Try switching up the furniture arrangement, adding a few new throw pillows, or changing up the artwork on the walls. Sometimes little tweaks can breathe new life into your room and spark bigger ideas.
- Ask for Feedback– Sometimes, you just need a fresh perspective. Ask a friend, family member, or even an online community for their thoughts. You might be surprised by how an outside opinion can bring clarity or even inspire a new direction.
- Celebrate Progress, No Matter How Small– Remember, every step forward counts. Whether you’ve rearranged your bookshelves or added a new rug, celebrate your progress! Little wins can help you gain the confidence to keep moving forward and embrace the transformation.
By following these steps, you’ll soon feel inspired and ready to tackle your home redesign. Before you know it, you’ll be loving your space again, one small change at a time.
Where do you start when decorating?
Now that you’re feeling inspired and ready to take action, you might be wondering—what’s the next step?
Before you dive into the fun part, it’s worth taking a moment to interview yourself. Ask yourself what’s motivating this redecoration. Are you simply tired of your space?
Looking to make it more functional? Or are you trying to create a space that reflects a new phase of your life? Understanding your motivation can help you stay focused and make decisions with purpose.
Even though it might feel like every room in your house is stuck in a design rut, it’s best to tackle just one room at a time. Trust me on this—trying to overhaul your entire home all at once will leave you feeling overwhelmed and possibly more stuck than when you started.
Start by selecting the room that bothers you the most. Is it the living room, where you spend most of your time? Or maybe the kitchen, where you’re craving a fresh, inviting look?
Choose one, and focus on completing it before moving on to the next. This way, you’ll have a clear sense of accomplishment, and your energy won’t get scattered across too many projects.
Once you’ve selected your room, begin with simple, manageable changes. Whether it’s rearranging furniture, swapping out throw pillows, or adding a new piece of art, small updates will help you build momentum.
Before you know it, you’ll be ready to dive in with both feet and transform the space into something you’ll love!
In what order should you decorate a room?
Okay – you’ve climbed out of that rut and are feeling inspired once again. That’s a reason to celebrate!
But where to start? What is the correct order to decorate a room?
Before you jump in and start making changes, it’s important to know the right order to tackle your space. Following a structured approach can save you time, money, and a lot of frustration. Plus, it’ll help ensure that everything comes together cohesively.
I’ve already touched on some of these steps, but here’s a handy guide to help you stay organized, whether you’re doing a quick room refresh or taking on a full-blown redecorating project:
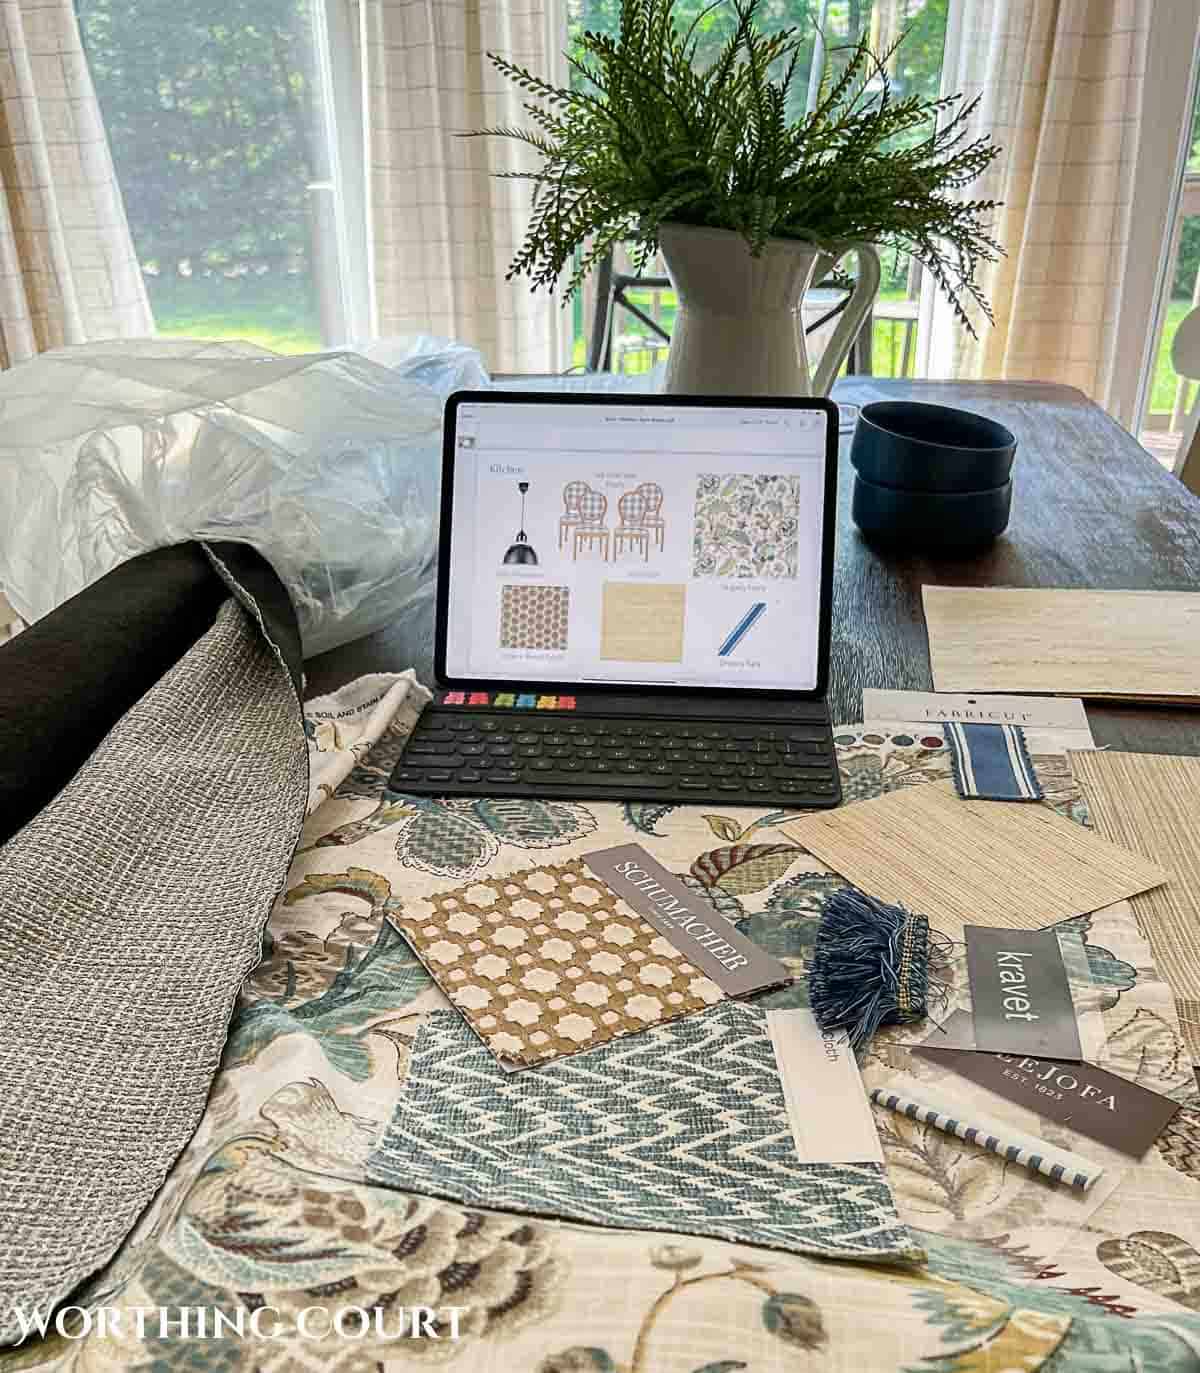
1. Create a Vision and a Budget
Start by gathering inspiration! Pull out those magazine pages you’ve been holding onto, or review your Pinterest boards. Narrow down the top three spaces that resonate with you the most. Don’t worry about the specifics like room layout yet; you’re simply choosing what feels right.
Then, create a budget. Allocate funds toward the key elements: 40-50% for furniture, 10-15% for paint or wallpaper, 10-15% for flooring, 10% for lighting, 5-10% for window treatments, 5-10% for textiles, 5-10% for art and accessories, and 10-20% for installation and labor. Focus on the essentials first before splurging on decorative items.
2. Plan and Design
Decide what the primary function of the room will be—this will guide all your decorating decisions. If your room has any tricky design challenges, take note of them. Sketch a floor plan or use design software to ensure the furniture fits and flows properly.
Create a mood board (or design board) to bring your ideas to life. It’s a fantastic visual tool that will keep you focused and give you something to refer back to as you go. Even if your space evolves, your mood board is a solid starting point.
3. Settle on a Style and Color Scheme
Decide on the overall aesthetic of the room—will it be modern, traditional, colorful, or neutral? Choose a primary color palette with two core colors for walls, floors, and large furniture pieces.
These should be versatile background colors. Then, add up to three accent colors for smaller details like pillows, draperies, and accessories.
I highly recommend creating a design board for yourself. Not only is it fun, it’s a great way to see your vision come to life before spending a dime!
4. Prepare the Room
Clear out the old furniture and decorations—or move everything to the center and cover it to protect it from dust and paint. Fix any imperfections on the walls or floors, making sure surfaces are clean and smooth for the next steps.
5. Paint and/or Wallpaper
Tackle the ceilings first, followed by the walls, and finish with the trim. This order ensures a clean and efficient process, with no paint spills on freshly done trim.
6. Install Flooring
If you’re changing the flooring, this should be done before bringing in any large furniture pieces. It saves you the hassle of maneuvering heavy items around, and it helps avoid any accidental damage.
7. Major Installations
Install important fixtures, such as lighting or built-in shelves. Don’t forget to hang blinds or window treatments—they’re an essential part of finishing the look.
8. Add Area Rugs and Furnishings
Lay down large area rugs first—especially if they’ll sit under furniture. Then bring in your larger furniture pieces before positioning smaller items like chairs or tables. Add accent furniture, such as footstools or plant stands, and finish by positioning any floor lamps.
9. Time to Decorate!
Now comes the fun part! Add table lamps, artwork, and accessories to give the room character. Layer in pillows, throws, and blankets for texture and coziness.
10. Enjoy Your Space!
Step back, take it all in, and enjoy the transformation! Revel in how your space has come together, knowing that you followed a thoughtful process that led you to this moment.
Above all, fill your home with things you love.
A key secret to being truly happy with the look of your home is filling it only with what you love—not with what the magazines or design shows say are the latest and greatest trends.
It’s similar to the saying, “Do a job you love, and you’ll never work a day in your life.” Well, the same philosophy can be applied to your home: Fill your space with things you love, and you’ll never feel dissatisfied.
When your home reflects your personal taste, it becomes a place where you feel comfortable and inspired. Sure, trends can be fun to explore, but your home should be a reflection of you. Whether it’s a treasured family heirloom, a quirky piece of art, or a simple item that brings back a happy memory—make sure it resonates with you.
Scott Adams, the creator of the famous comic strip Dilbert, once said: “Creativity is allowing yourself to make mistakes. Design is knowing which ones to keep.”
Embrace your creativity in your home, allow yourself to experiment, and let your space be filled with the things that bring you joy—because in the end, that’s what will make your house truly feel like a home.

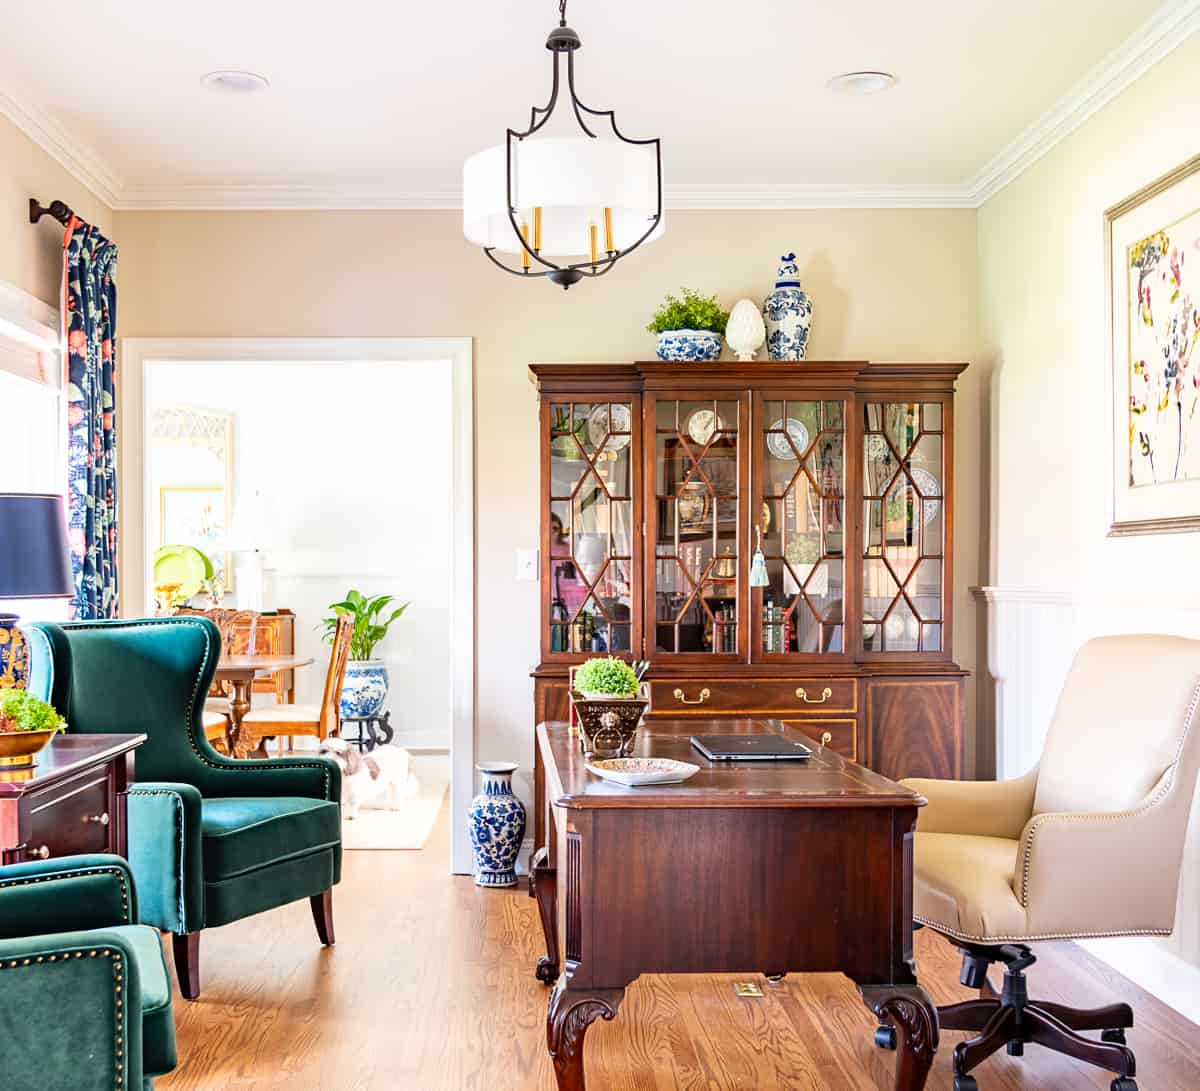
Great advice. I have a problem with not finishing one room before starting another. It’s hard for this ol’ dog to learn new tricks.? But I’m working on it. I have always been in love with your desk. Love the gray!
Oh, I can SO relate to that! I have to literally force myself to finish one room or before I know it, I’ve got twelve pans in the fire! lol
Hi there, I would like to know if the desk in the picture is painted the same gray that you used on your dining room table. I am planning on painting my bedroom set which is cherry and I’m thinking this gray may be the answer for me. I’ve recently painted the room with what looked to me like a neutral color (Sherwin-Williams Oyster Bar) but it definitely has a green cast to it. Mind you, I was trying to get away from green,replacing a deeper olive green on the walls. We used 2 coats of primer so I know it’s not that, but I am stumped now on choosing a color for the furniture. Although several people have advised using a cream or linen on the furniture, I’m afraid of the original finish bleeding through. Sorry for such a long post, but your rooms are so lovely they make me want to duplicate some of your ideas. Thank you!
Hi Margo. I’m sorry for taking so long to reply to you! Yes, the desk is painted with the same paint as the dining room furniture.
I think it is the best decorating I have ever seen. The room looks very pretty and full of beauty. Now I have to apply something new rather than replacing them. Thank you for sharing the good ideas and your effort.
Thank you, Sarah!
The painting point is great. With some pieces, it may not be worth completely replacing them to get a fresh look.
I have a piece I would like to paint. Would it change the value of the piece if I did?
Hi Betsy. I’m really not an expert at all, but I would be hesitant to paint an antique.
Your ideas are very helpful, but why do so many rooms have gray as the predominant color. Gray seems to be the trend. Gray is a nice neutral and is the most popular color and easy to find in almost every magazine and home improvement project. I would like to see some ideas that include other colors that show something other than what everybody else is using. Branch out and show other ideas that include bolder colors.
Hi Kathy. If you’re looking for bold colors in home decor, this probably isn’t the place for you.
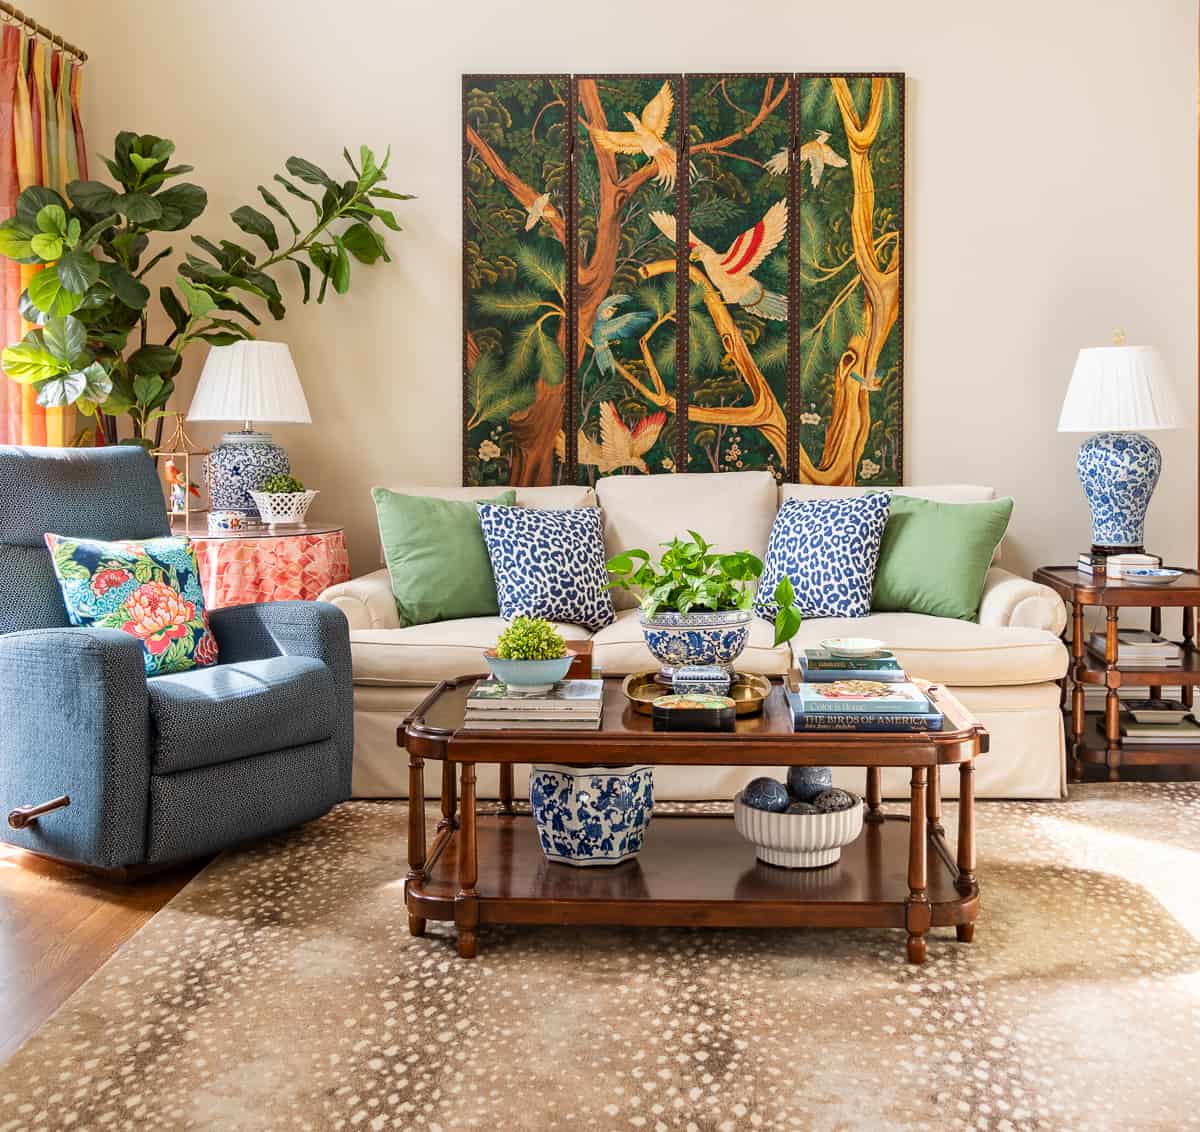
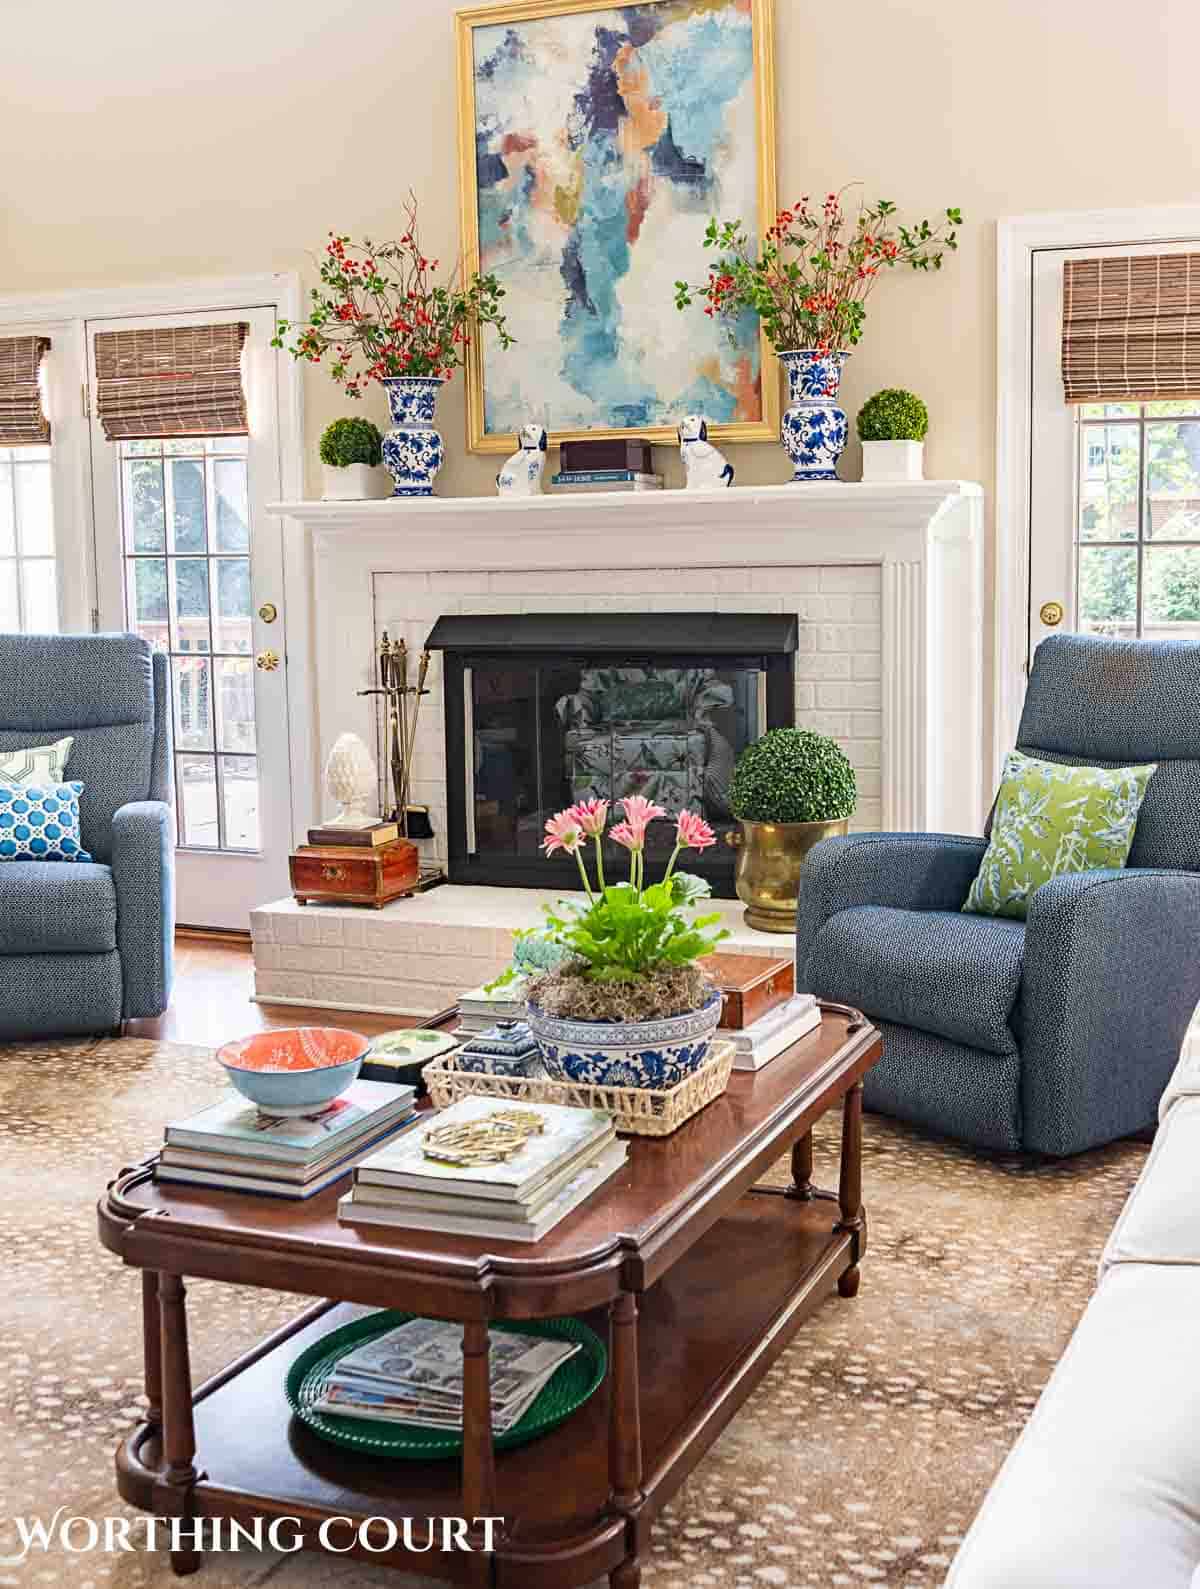
When we remodeled our current home, I purposely chose to use a neutral backdrop (on the walls, my rugs, my large pieces of furniture), so that I could bring in any colors that I wanted to through draperies, accessories, bedding, seasonal decor, etc. In every other home that I’ve lived in, I always had color on the walls, rugs, furniture, etc and found it to be very limiting in what I could do. You might be interested in taking a look at the rooms in our previous home to see what I mean, which you can do at this link: https://www.worthingcourtblog.com/category/house-tour/our-previous-home/. I’m much, much happier with my choice to go with a neutral backdrop in this home and the flexibility that it gives me!
Oh my..I wish I had an eye for “something” when it comes to decorating. I have a brand new home and I cannot get it to come together at all. I have nothing hung on the walls. I have an absolute blank palette (painted my walls white as in “my mind”, I would add pops of colour) I tried that (I guess) with cushions, but nothing really impressed me and I just don’t know what to do or where to go from here. I would say I want modern cozy, but, just don’t know how to build on that. I feel that the longer it stays like this, we will just get use to it and it won’t matter anymore.
Have you tried looking on Pinterest for rooms that appeal to you? I have literally found an image that I liked in a magazine (pre-Pinterest days) and tried to copy everything that was in the image. If I couldn’t find an exact match to items that were in the picture, I just got a close as a could. Going that route taught me SO much and helped to improve my self confidence over time.
I love your use of color😍🥰. Everything is so neutral these days! What wall color did you use in your living room? Thanks Robin
I’m glad you’re enjoying the color! The walls throughout my house, including the living room, are painted with Sherwin Williams Accessible Beige.
Suzy, thanks for sound advice….which happens to be the same order of steps as a contractor friend gave us. We are in the throes of some big projects, exterior and interior, and since I knew the steps and timeframe of some of the projects that would start in the Spring…..I determined to be ahead of the game plan. So in January and February I stripped wallpaper from our kitchen and hallway walls, and washed enough glue from the walls to put the Titanic back together. It was a major accomplishment, and I’m so glad it’s done and out of the way. I think anything you can do to make.things smoother down the road is a plus.
Wow – you’ve been busy! Wallpaper glue is so difficult to remove. I’m glad to hear that my advice agreed with a pro.
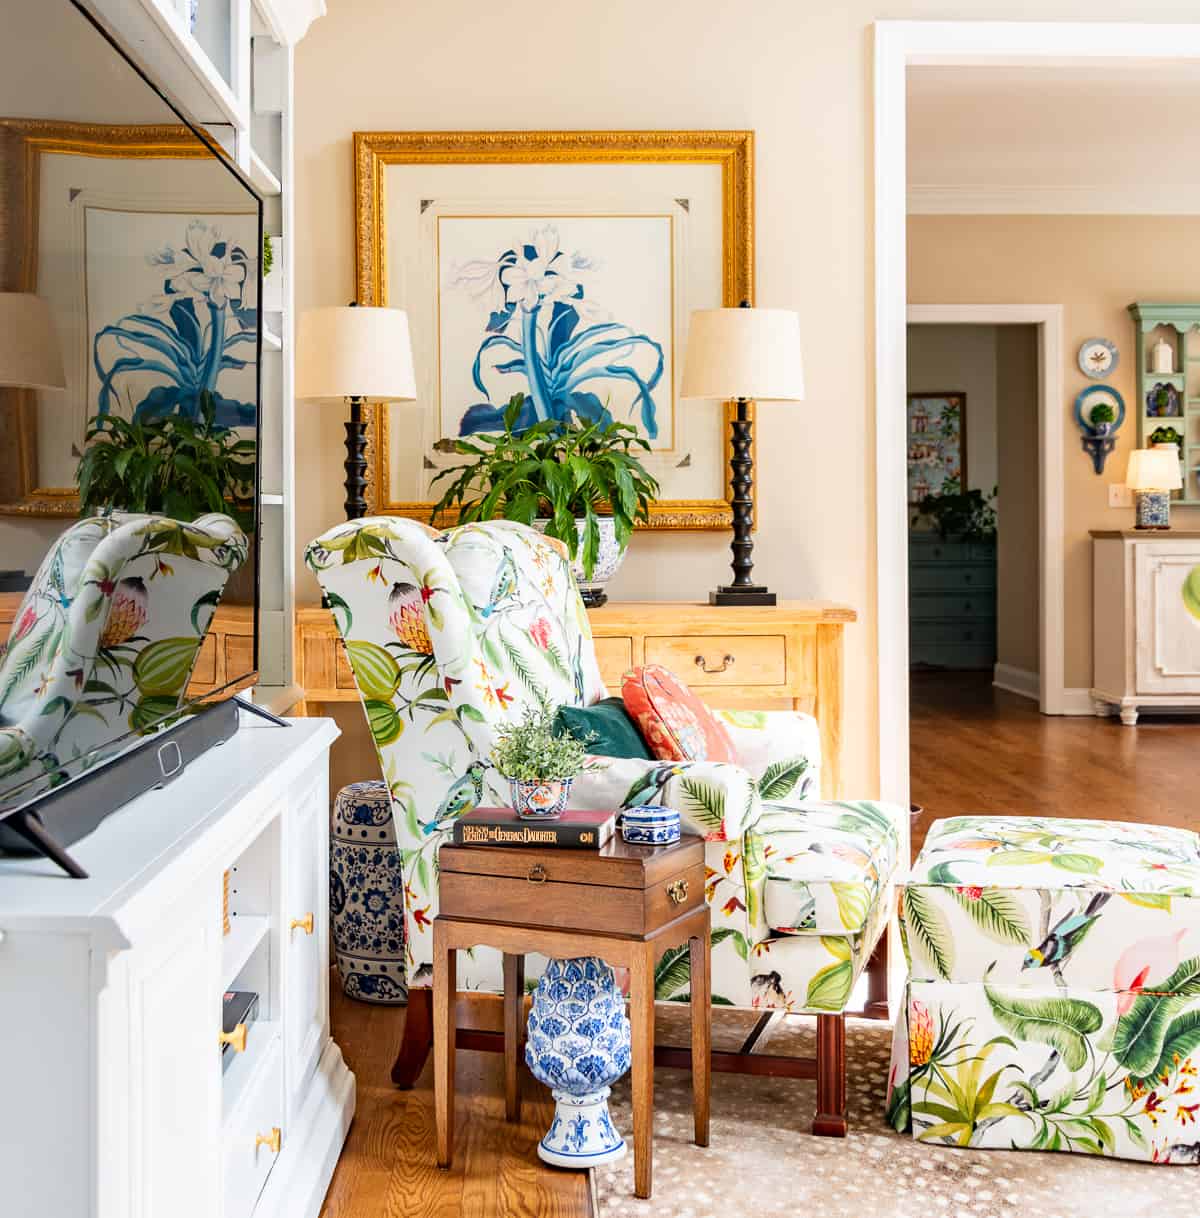
Absolutely love the fabric choice on your wing back chair and ottoman. Unfortunately, I’m in the search for a such a fabric and cannot locate one. Like. Would love to use that pattern fabric on an old chair that belonged to my mom. If you don’t mind, would you Please share your floral fabric choice that’s on your chair and ottoman!
Thank you,
Gina
It’s by Hamilton Fabrics and the style is Paradise Leaf. Isn’t it pretty?