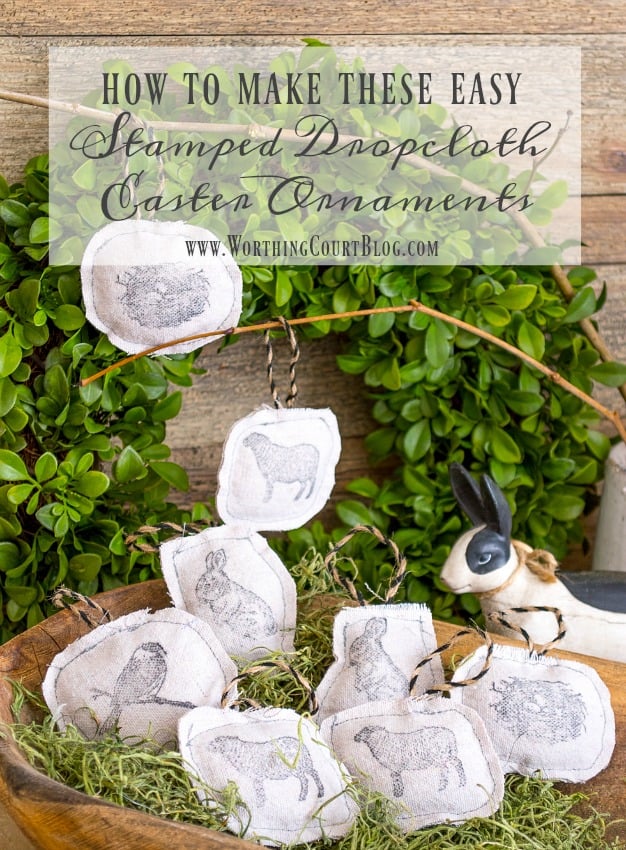
A Quick And Easy Easter Craft Using Stamps And Dropcloth – No Sewing Required!
Step by step directions for how to make an easy and super adorable Easter craft using any plain fabric and stamps. No sewing required!
I readily admit that crafting is not my strong suit. It isn’t that I can’t do them – it just isn’t something that I normally take the time to do. But – every now and then I’ll dream up an idea that is just too cute to pass up and this simple Easter craft is one of them!
When I do craft, I have three requirements: 1) it has to be simple, 2) it has to be quick and 3) it has to be affordable. This craft idea fits all three of my requirements, so today I’m going to show you how you can make these super cute and super easy little stamped Easter ornaments. Not only does it fulfill my three crafting requirements, it’s also fun to make!
While trying to come up with something quick and easy for my Easter decorating, I was looking for something a little different than the pastels and bright colors that you usually see. Not that I don’t love those – I do! But, put together a dropcloth and some stamps and you have these adorable Easter ornaments.

Displayed in a bowl or from a “tree”, I think these are super cute! They aren’t meant to be perfect and that’s one of the things that I love about them.

Let me show you how I made them so that you can make some too.
Supplies: Click on the item name to view online.

Affiliate links are provided for your convenience. See my full disclosure policy here.
Chickadee Rubber Stamp (similar)
Canvas Dropcloth – you’ll have plenty left over for other projects!
Bi-colored Jute Twine or Natural Jute Twine
Pillow Stuffing or Cotton Balls
Fabri-Tac Adhestive (if you prefer not to sew)
Sewing Machine – I highly recommend THIS ONE. I have this one and it’s great for beginning or advanced sewers. Or a needle if you prefer hand sewing.
The Process:
Step 1) The first thing to do is to stamp the images onto the dropcloth. I made my ornaments double-sided, so I stamped two images for each ornament. They don’t have to be perfectly spaced – just far enough apart so that there is some room around the image for when you cut them out.

Step 2) Cut the dropcloth into rough squares around the images. The squares don’t have to be perfect in size.

Step 3) Place the cut squares wrong sides together, lining the images up as closely as you can. Sew around the image using a long stitch. Make sure to leave an opening to put the stuffing into. You’ll have to ignore that black ink on my fingers!
Step 3 – Alternate Method) Place the cut squares wrong sides together and glue the edges together using Fabri-Tac adhesive. Make sure to leave an opening to put the stuffing into.

Step 4) Using your fingers, fill the sewn area with stuffing or cotton balls. If you glued the edges instead of sewing them, allow the glue to completely dry before doing this step.

Step 5) After filling with stuffing, roughly cut the excess dropcloth around the image. Remember, these aren’t supposed to be perfect.
Step 6) Cut a piece of twine about 6″ long, fold it in half and insert the ends into the inside of the stuffed ornament. Sew or glue the top closed, securing the twine. Snip all of the thread ends to clean them up. But remember, a little unraveling around the edges is a good thing! If you glued your ornament instead of sewing, use clothespins to clamp the opening until the glue has completely dried.

Enjoy your cute little creations!


LOL is right! Yep, that’s my Jersey cow bunny. He’s on wheels so he gets around very well! 😀
Suzy,
Simple, quick, and inexpensive, that is the way to go. I love these! Thank you for sharing!!!
Thanks, Kenetta!